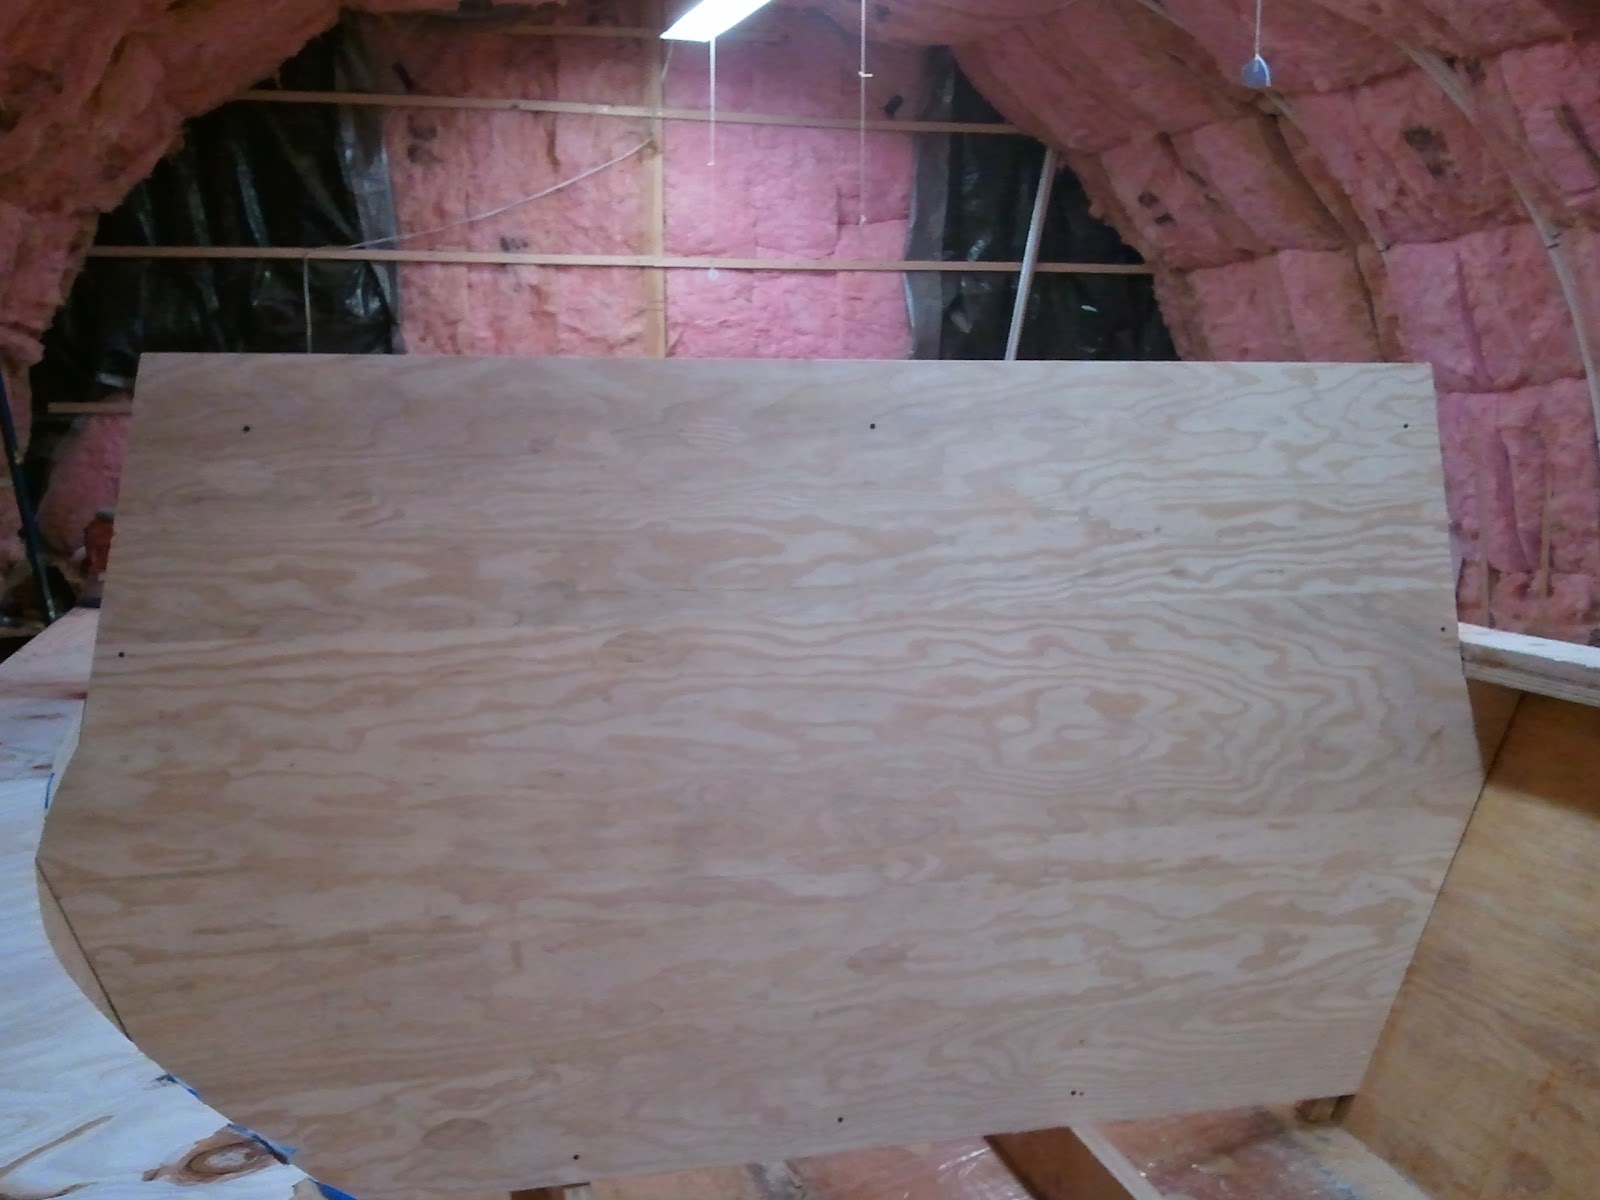
Today was prep day for tomorrows big fiberglassing day.
First off I cut the ribs apart, trimmed the excess fiberglass off, flipped 'em over, coated them with epoxy and put on fiberglass.
Then it was on to sanding the shelves. Both the gap filling peanut butter on the sides and the epoxy filling the gaps and holes on the top got sanded down. And while I was at it I took the sander to the PVC pipes on the bow. Didn't take but a couple minutes to smooth them right down.
Last was cleanup inside the hull. I swept and vacuumed the entire inside and really worked at the crevices between the stringers and the hull. I had hoped to get the last of the sanding on the hull done and a final washdown done, but that just didn't happen. I have to sand the areas of the hull I'm going to fiberglass because about 72 hours after epoxy is applied it hardens to the point that the only way to get new epoxy to adhere is mechanically instead of chemically. So there's work to be done before the fiberglassing starts.
The plan for tomorrow is: do the sanding first, vacuum again, wash the inside, fiberglass the sides-to-chines and sides-to-transom joints, then the outside of the stringers to the hull, the inside of the stringers to the hull and finally the hull to the transom. It's an ambitious plan, but once I start tomorrow I'll probably work right through to the finish no matter how long it takes.
I want this done.
3.5 Hours
Saturday, January 7, 2012
Friday, January 6, 2012
Day 101 - Tanks a lot
Today was a day for little things, but two big things arrived in the mail.
My gas tanks! I ordered two 27 gallon tanks that will sit in the cabin back against the rear bulkhead. They'll sit on the decking and ribs installed on the hull that I worked on tonight.
Each of the ribs had to be customized some to get them to fit right. There are eighteen of them, nine to a side and the hull changes shape underneath about half of them. The others, well, let's just say my fiberglass job wasn't as smooth as it might be next time. :-)
Anyways, after getting them all to fit I unboxed one of the tanks and put it in its approximate position.
Looks good! I'm still debating whether I want to add a third tank below the rear deck. My goal for running distance on this boat is down to Tracy Arm and back and that's about 200 miles or so, and conservatively figuring 4MPG I'm perilously close to the edge. Having the third tank wouldn't mean I'd have to fill it or use it, it just adds options and distance and that could make the difference between going somewhere or not. We'll see.
After this I took all the ribs out, put a piece of 3/4" ply on the sawhorses, covered it with poly and using the long scrap pieces of 4oz cloth left over from the side panels. I fiberglassed all the ribs at once. Lay out all the pieces, mix and spread some epoxy and simply roll the fiberglass over the top. Much faster than cutting individual pieces and really no more waste.
Tomorrow I'll cut them out, flip them over and repeat. Then I'll start cleaning the hull. I've got to make sure everything's sanded where it should be and then I'll vacuum it, and finally I'll wash it with ammonia and water. No much fun, but gotta be done!
3 Hours
My gas tanks! I ordered two 27 gallon tanks that will sit in the cabin back against the rear bulkhead. They'll sit on the decking and ribs installed on the hull that I worked on tonight.
Each of the ribs had to be customized some to get them to fit right. There are eighteen of them, nine to a side and the hull changes shape underneath about half of them. The others, well, let's just say my fiberglass job wasn't as smooth as it might be next time. :-)
Anyways, after getting them all to fit I unboxed one of the tanks and put it in its approximate position.
Looks good! I'm still debating whether I want to add a third tank below the rear deck. My goal for running distance on this boat is down to Tracy Arm and back and that's about 200 miles or so, and conservatively figuring 4MPG I'm perilously close to the edge. Having the third tank wouldn't mean I'd have to fill it or use it, it just adds options and distance and that could make the difference between going somewhere or not. We'll see.
After this I took all the ribs out, put a piece of 3/4" ply on the sawhorses, covered it with poly and using the long scrap pieces of 4oz cloth left over from the side panels. I fiberglassed all the ribs at once. Lay out all the pieces, mix and spread some epoxy and simply roll the fiberglass over the top. Much faster than cutting individual pieces and really no more waste.
Tomorrow I'll cut them out, flip them over and repeat. Then I'll start cleaning the hull. I've got to make sure everything's sanded where it should be and then I'll vacuum it, and finally I'll wash it with ammonia and water. No much fun, but gotta be done!
3 Hours
Wednesday, January 4, 2012
Day 100 - Really?
Well, I was originally going to title this post, "Ribs Baby!", but then I realized it was build day 100. Wow, what a milestone, especially since there's not that many more than that left before the shed comes down. Yikes!
Anyways, today was the first prep day for Saturday and Sunday. This weekend will be a big fiberglass party so I'm doing the little stuff (and big stuff too!). Today I put the forward bulkhead together and set it aside. There's work yet to do on it, but it'll have to wait.
Next I mixed up a batch of epoxy to finish filling all the seams and holes in the shelves. Friday they'll be sanded smooth.
The last thing I worked on tonight, but the one that took all the time, was rough cutting out a set of ribs that go between the stringers and the sides in the cabin.
When I cut these the first time they were much shorter. I was going to run a floor across these and set the fuel tanks down next to the stringers. After I cut enough for the first side I realized that I wouldn't have enough space to run my conduits (which will be used to carry wiring and hoses below the deck). So back to square one. And the tanks will just have to sit about two inches higher.
No big deal.
But I did discover that with the new skilsaw I can (after tracing with a pattern) cut one of these ribs out in about three minutes. And I can do a nifty job of cutting a small pile of big scrap pieces of plywood into a big pile of little scrap pieces of plywood. :-)
4 Hours
Anyways, today was the first prep day for Saturday and Sunday. This weekend will be a big fiberglass party so I'm doing the little stuff (and big stuff too!). Today I put the forward bulkhead together and set it aside. There's work yet to do on it, but it'll have to wait.
Next I mixed up a batch of epoxy to finish filling all the seams and holes in the shelves. Friday they'll be sanded smooth.
The last thing I worked on tonight, but the one that took all the time, was rough cutting out a set of ribs that go between the stringers and the sides in the cabin.
When I cut these the first time they were much shorter. I was going to run a floor across these and set the fuel tanks down next to the stringers. After I cut enough for the first side I realized that I wouldn't have enough space to run my conduits (which will be used to carry wiring and hoses below the deck). So back to square one. And the tanks will just have to sit about two inches higher.
No big deal.
But I did discover that with the new skilsaw I can (after tracing with a pattern) cut one of these ribs out in about three minutes. And I can do a nifty job of cutting a small pile of big scrap pieces of plywood into a big pile of little scrap pieces of plywood. :-)
4 Hours
Tuesday, January 3, 2012
Day 99 - Just a little bit...
Got done today. Today was a crazy unusual day that left me with little time to work on the boat. However my epoxy supplies have arrived, in five gallon buckets this time, which is a huge step forward. Just about everything will stop so I can get the rest of the hull joints fiberglassed.
But I did manage to get one thing done tonight. I put a second coat of paint on the bulkhead.
So...
1 Hour
But I did manage to get one thing done tonight. I put a second coat of paint on the bulkhead.
So...
1 Hour
Monday, January 2, 2012
Day 98 - More bulkhead work
Today was a continuation of the work on the forward bulkhead from yesterday. However, there was an unplanned trip to Home Depot. Yesterday, right at the end of the evening, my skilsaw blew out its' bearings. Not quite physically, but literally. I was making my last cut of the night when a huge noise and shaking came from the saw when the bearings self destructed. Most disconcerting! Anyways, I think I'm going to like the new saw, it has a really nice gauge for setting the saw angle in actual single digit increments instead of the five degrees increments on my old saw. This will be much faster to use than my wooden block that has multiple angles drawn on it. I also bought more hinges and a latch.
I took the forward piece of plywood out and started cutting. Not only did I cut out the hole for the doorway, but I also cut a hatch for access to the electrical stuff. I built it just like the one in the rope locker with a backer piece, two hinges and a latch. I made it as big as reasonably possible to allow for maximum access. I learned this from my dads boat. His access panel is way too small and that makes it a pain to work on anything.
Then I pulled both pieces of the bulkhead out of the boat and attached them together. I marked a 1/16" line on the forward panels where the sides will go and got to work with the sander. This 1/16" reflects the curvature of the hull I was talking about yesterday.
Last, I took the pieces apart and painted the insides with Rustoleum white enamel paint.
There will be no exposed wood in this boat. It will either be painted with an oil based paint or epoxied and painted. There are two keys to keeping a boat like this in good condition; preventing the build up of moisture and humidity with good air circulation, and two, providing quality moisture barriers. Ironically enough, epoxy is not a great moisture barrier. Epoxied wood left in the presence of still-air humidity will absorb that moisture. Gotta keep the air either dry or moving.
The bulkhead has several things left to do on it before it can be permanently installed. I will be installing PVC conduits between the forward bulkhead and the rear bulkhead, between the forward bulkhead and the stern, and between the rear bulkhead and the stern. These conduits will run outside the stringers below the decks and will be used for electrical wiring, hydraulic lines and fuel lines. Vent holes need to be cut and vents installed near the top of the bulkhead panels (the bottom will not be sealed closed). A conduit needs to be installed from one side of the bulkhead to the other in the chase at the bottom of the doorway. Another coat of paint needs to be applied to the inside. The blocking between the stringers and outboard of the stringers needs to be installed.
Then the bulkhead can be finalized. One thing that you haven't seen in the pictures is how the front and rear panels of the bulkhead neatly fit on either side of the vertical framing for the sides. You might remember how much grief those gave me when I installed them and they didn't look straight. Well, they were and still are ;-), and they've nicely lined up exactly where I need them to be. Yay!
5 Hours
I took the forward piece of plywood out and started cutting. Not only did I cut out the hole for the doorway, but I also cut a hatch for access to the electrical stuff. I built it just like the one in the rope locker with a backer piece, two hinges and a latch. I made it as big as reasonably possible to allow for maximum access. I learned this from my dads boat. His access panel is way too small and that makes it a pain to work on anything.
Then I pulled both pieces of the bulkhead out of the boat and attached them together. I marked a 1/16" line on the forward panels where the sides will go and got to work with the sander. This 1/16" reflects the curvature of the hull I was talking about yesterday.
Last, I took the pieces apart and painted the insides with Rustoleum white enamel paint.
There will be no exposed wood in this boat. It will either be painted with an oil based paint or epoxied and painted. There are two keys to keeping a boat like this in good condition; preventing the build up of moisture and humidity with good air circulation, and two, providing quality moisture barriers. Ironically enough, epoxy is not a great moisture barrier. Epoxied wood left in the presence of still-air humidity will absorb that moisture. Gotta keep the air either dry or moving.
The bulkhead has several things left to do on it before it can be permanently installed. I will be installing PVC conduits between the forward bulkhead and the rear bulkhead, between the forward bulkhead and the stern, and between the rear bulkhead and the stern. These conduits will run outside the stringers below the decks and will be used for electrical wiring, hydraulic lines and fuel lines. Vent holes need to be cut and vents installed near the top of the bulkhead panels (the bottom will not be sealed closed). A conduit needs to be installed from one side of the bulkhead to the other in the chase at the bottom of the doorway. Another coat of paint needs to be applied to the inside. The blocking between the stringers and outboard of the stringers needs to be installed.
Then the bulkhead can be finalized. One thing that you haven't seen in the pictures is how the front and rear panels of the bulkhead neatly fit on either side of the vertical framing for the sides. You might remember how much grief those gave me when I installed them and they didn't look straight. Well, they were and still are ;-), and they've nicely lined up exactly where I need them to be. Yay!
5 Hours
Day 97 - Snow and rain and bulkheads oh my!
No, you're not seeing things. This didn't get posted yesterday because I left my computer at the shed and there's no way I'm going to try to do this on my smartphone. :-)
So yesterday was the start of work on the forward bulkhead. This structure will play many parts in the boat. One, it's structural, it will add a large amount of stiffness to the hull. Two, all of the electrical distribution and management (except for the batteries and chargers) will happen here. Three, it obviously defines the separation between the cuddy and the main cabin. Four, it defines the transition between straight part of the sides and the curve of the sides forward.
The building of the bulkhead differs little from the flotation tank and rope locker; build a jig, cut patterns and transfer to the plywood for cutting. The jig in this case was a piece of plywood screwed to a 2x4, then screwed to the stringers.
Now this work was being done between trips outside to clear the falling snow. Three times to sweep off the shed and twice to clear the driveway. I think we got somewhere around nine inches for the day. Ironically enough, later that evening it warmed up to 41 degrees. Winter in Juneau!
Once the pattern was transferred to a sheet of 1/2" ply then the cutting began. A large hole was cut in the middle to play the part of a doorway between the cuddy and the cabin. Mine will not have a door, just a simple curtain.
Next was the supports for the bulkhead. I initially contemplated using 1x4's but switched to 2x4's for the added strength. It's more weight that I'll try to shave off elsewhere, but I'm comfortable with it here.
You'll note the 2x4's don't go all the way around. Those areas without will be epoxied to the hull. After a little bit of adjustment with the sander this half of the bulkhead made a nice snug fit and it was on to the front side of the bulkhead.
I used the jig and the same patterns as the hull is basically the same shape this close to the previous layout for the first bulkhead, however it is a bit narrower so the ease of use of the patterns becomes obvious. Remove the screws holding the patterns to the jig, move the patterns in a skosh and put the screws back in. Ta da! Cut out the new bulkhead piece and slip it in place. I traced the outline of the existing bulkhead and doorway on it and I'll trim those out tomorrow.
You can just barely see in the upper of the two photos a gap between the side of the bulkhead and the shelves. That 1/2" gap is for the upper sides of the cabin and cuddy. I could butt those sides against the bulkhead, but this method adds more structural strength and more naturally ties things together. However it did have an unexpected consequence. The shelves have a very slight curvature at the bulkhead and since the bulkhead is square I'm going to have to trim the bulkhead just slightly to allow enough room for the plywood to fit it. I'll do that tomorrow.
8 Hours
So yesterday was the start of work on the forward bulkhead. This structure will play many parts in the boat. One, it's structural, it will add a large amount of stiffness to the hull. Two, all of the electrical distribution and management (except for the batteries and chargers) will happen here. Three, it obviously defines the separation between the cuddy and the main cabin. Four, it defines the transition between straight part of the sides and the curve of the sides forward.
The building of the bulkhead differs little from the flotation tank and rope locker; build a jig, cut patterns and transfer to the plywood for cutting. The jig in this case was a piece of plywood screwed to a 2x4, then screwed to the stringers.
Now this work was being done between trips outside to clear the falling snow. Three times to sweep off the shed and twice to clear the driveway. I think we got somewhere around nine inches for the day. Ironically enough, later that evening it warmed up to 41 degrees. Winter in Juneau!
Once the pattern was transferred to a sheet of 1/2" ply then the cutting began. A large hole was cut in the middle to play the part of a doorway between the cuddy and the cabin. Mine will not have a door, just a simple curtain.
Next was the supports for the bulkhead. I initially contemplated using 1x4's but switched to 2x4's for the added strength. It's more weight that I'll try to shave off elsewhere, but I'm comfortable with it here.
You'll note the 2x4's don't go all the way around. Those areas without will be epoxied to the hull. After a little bit of adjustment with the sander this half of the bulkhead made a nice snug fit and it was on to the front side of the bulkhead.
I used the jig and the same patterns as the hull is basically the same shape this close to the previous layout for the first bulkhead, however it is a bit narrower so the ease of use of the patterns becomes obvious. Remove the screws holding the patterns to the jig, move the patterns in a skosh and put the screws back in. Ta da! Cut out the new bulkhead piece and slip it in place. I traced the outline of the existing bulkhead and doorway on it and I'll trim those out tomorrow.
You can just barely see in the upper of the two photos a gap between the side of the bulkhead and the shelves. That 1/2" gap is for the upper sides of the cabin and cuddy. I could butt those sides against the bulkhead, but this method adds more structural strength and more naturally ties things together. However it did have an unexpected consequence. The shelves have a very slight curvature at the bulkhead and since the bulkhead is square I'm going to have to trim the bulkhead just slightly to allow enough room for the plywood to fit it. I'll do that tomorrow.
8 Hours
Sunday, January 1, 2012
Day 96 - Gettin' close
Well, the forward shelves are basically done. I pulled all the screws and clamps from two days ago then started sanding the edges of the shelves even with the sides. That went well except for one spot on the starboard side where the two side panels came together and were epoxied in place. For some reason right at the shelf they bulged out about 3/16". There must have been some little bit of debris in there and I just didn't notice it. Oh well. So in that area today I carefully shaved a little bit of it down with the planer, then sanded the transition somewhat to smooth it out. I can't take it all down or the plywood would just be too thin. I'll refiberglass this area when I glass the outside of the shelves.
Once the sanding was done I made a jig out of a piece of 2x4 and three screws to mark the cutting width of the shelves. I drove two screws perpendicular to the length of the 2x4 and then one screw at the distance I wanted to mark. Then I simply ran it up the side holding the two screws against the shelf and using the third to make a scratch mark. Then I set the skilsaw for 12 degrees (the slant of the sides of the cabin) and cut from the rear almost all the way forward. Couldn't quite get all the way as the curve just got too much.
I cut down the other side and then finished the cuts with a reciprocating saw. Sanded out the curves then the tops making all the pieces even.
Next up was the router with a 3/8" roundover bit. That was run down the outside of the shelves and then once again the sander to finish the round over.
Looks great!
I made so much sawdust inside the boat I finally had to stop and clean it out with the shop vac. Still waiting for the resin and hardener to arrive, but once it does the inside will really have to be cleaned up!
Last for the night was filling the holes from the screws with straight epoxy and then the gaps between the sides and the shelves with peanut butter. All of this will be, you guessed it, sanded smooth tomorrow. Then I think I'll start on the cuddy/cabin bulkhead.
8 Hours
Once the sanding was done I made a jig out of a piece of 2x4 and three screws to mark the cutting width of the shelves. I drove two screws perpendicular to the length of the 2x4 and then one screw at the distance I wanted to mark. Then I simply ran it up the side holding the two screws against the shelf and using the third to make a scratch mark. Then I set the skilsaw for 12 degrees (the slant of the sides of the cabin) and cut from the rear almost all the way forward. Couldn't quite get all the way as the curve just got too much.
I cut down the other side and then finished the cuts with a reciprocating saw. Sanded out the curves then the tops making all the pieces even.
Next up was the router with a 3/8" roundover bit. That was run down the outside of the shelves and then once again the sander to finish the round over.
Looks great!
I made so much sawdust inside the boat I finally had to stop and clean it out with the shop vac. Still waiting for the resin and hardener to arrive, but once it does the inside will really have to be cleaned up!
Last for the night was filling the holes from the screws with straight epoxy and then the gaps between the sides and the shelves with peanut butter. All of this will be, you guessed it, sanded smooth tomorrow. Then I think I'll start on the cuddy/cabin bulkhead.
8 Hours
Subscribe to:
Posts (Atom)