No pictures tonight, just nothing interesting to look at. :-)
The two boo-boos were corrected tonight. The starboard side one was trimmed off and the port side one was trimmed back.
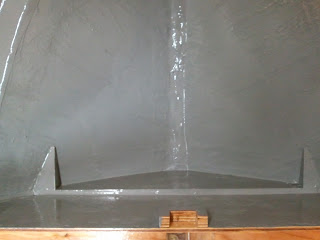
Then I worked on trimming and sanding back the edges of the shelves installed yesterday even with the hull.
And then it was on to actually installing more shelf pieces. The starboard side long piece was first, then I used two pieces on either side to fill in the gap between the forward piece from the bow and the long middle piece. Each new piece was carefully cut to shape, glued, screwed and clamped in place.
Tomorrow I'll pull all the screws and clamps and trim and sand the outside edges. I might get so far as to cutting the inside angle, but we'll see about that. Once that inside angle is cut I can install the wide shelf pieces at the back on the rear deck.
Oh, my fiberglass arrived today. Yay! I suspect the epoxy will arrive next week and I've ordered the two fuel tanks that will go in the cabin space; 27 gallons each.
3 Hours
Thursday, December 29, 2011
Wednesday, December 28, 2011
Day 94 - Piece by piece
Progress on the shelves is being made one piece at a time. With the curve of the hull and the width of the shelves the most efficient use of the plywood is small pieces, but that means more time and fitting. I got five more pieces fitted; two port and two starboard back from the bow.


You'll note that they're very uneven on the inside. That's by design. I'm getting them close on the outside, then I'll make a jig and by using the outside as a guide draw an inside line to cut to. In the cabin and the cuddy those inside cuts will be 21 degrees inward to provide some inward slant to the walls/windows.
The fifth piece was put in place midway down the port side.

Why out in the middle of the shelf? Two reasons; one, because there's still some curve coming around the hull and I wanted to cut a long straight piece for here, and two, because from the rear edge of this piece to the transom is the rear deck and the shelves will be wider there. The rear edge of this piece also defines the rear bulkhead.
I also worked on fixing an old boo-boo tonight. When I cut the shelf piece that spanned the gap from the transom corner piece to the shelves coming down from the bow while the hull was upside down I somehow managed to cut it 3/4" too narrow. Tonight I cut a piece to fill that gap and will trim it to shape tomorrow.

Along with continuing work on the shelves tomorrow I also have to fix this boo-boo.

This piece at the stern got cut too wide initially so I have to trim it down as well.
Technically I don't have to fix these things as they have no structural effect at all, but I would know it was there and if I don't fix it now I'd never be happy about it. :-)
More snow today. The neighbors put up lights on their bushes and it was pretty to look at. The picture's iffy, but you get the idea.

4 Hours
Tuesday, December 27, 2011
Day 93 - Assembling pieces again
Well, today was pretty simple. I cut the hawse pipe down to length, covered the bottom of the hole with blue tape for support, thoroughly covered the pipe with 3M 4200, wiggled it into the hole, put a bead around the top edge and put a strip of blue tape across the top to hold it in place when I flipped the deck over.
Opened up the Bilgekote again and after covering the drain holes again, painted the area I fiberglassed in yesterday, the areas I sanded and pushed some into the drain holes with the brush.
Made some epoxy and covered the top of the shelves and the bottom of the deck, then made peanut butter and with a serrated scraper applied a coat to the top of the shelves. This was done to fill in any gaps between the shelves and the deck, but without applying so much that the squeeze out would be uncontrollable. I very carefully lifted the deck into the hull (not wanting to bump the hawse pipe), climbed in and then just as carefully aligned it and set it on the shelves. I screwed in the two locator screws and then climbed out on the deck to use my weight to push the deck down into the peanut butter and then drove screws to hold it in place.
Being way out at the tip of the bow was a little freaky. Mentally I knew the boat wasn't going to tip down, but it was hard to convince that animal brain!
After putting in the screws I scraped up the squeeze out and used it to fill the gaps between the sides and the shelves. On the port side that gap was almost 3/8" so after pushing peanut butter in I covered it with blue tape to try to keep it from flowing back out. :-)


Took the tape off the drain holes and cleaned up the paint that flowed out. I suspect I'll find more runout on the hull tomorrow, but nothing I can do about that, can't cover up the holes.
Tomorrow the shelving continues!
3 Hours
Monday, December 26, 2011
Day 92 - Intentional holes
Today was spent intentionally drilling large holes in the hull. Needless to say, this is highly stressful after spending all that time and effort to eliminate them, and one spends much time planning so as to not have a DDD moment. :-)
From yesterday, here's a picture of the fairing on the spray rails at the bow.

So today was spent spending the gift cards I got yesterday for Christmas. But not only did I go to Home Depot, I also bought the first hardware for the boat, namely deck cleats and a pad eye at Western Auto.
When I got to the shed, the first order of business was to clear the snow that had fallen today. This is the first snow we've had in two plus months for which I've been grateful as it reduces the stress level.
After unpacking my purchases I installed the pad eye near the bottom of the rope locker. The end of the anchor rope is attached here; it's the last chance to keep from losing your anchor and rope when things go wrong.
Next up was installing the forward tie rope support. This is two holes in the bow, connected by pipe, wrapping around the bowstem. This is used instead of an eyebolt that would go into or through the bow stem and is much stronger as there's nothing to pull out. To drill and align the holes requires building a jig to both line up the holes and to support the hole saw as I was drilling at an angle into the hole. This was pretty stressful; screw this up and while it's not irrepairable, it would a a huge DDD!

Now Renn calls for building this contraption I'm about to install out of 1 1/4" copper pipe, but when I went to buy that pipe today I about choked. $45 for five feet! I needed less than one foot, so plan B. I bought some 1 1/4" PVC and two elbows. After some careful measuring and cutting I had it built. To help lock it in place I glued it to the inside with 3M 4200.

As you can see, I got ahead of myself with the painting so I sanded off the paint, applied a thick layer of peanut butter to the top and bottom gaps, and then covered the whole thing with three layers of 7oz glass.

I'll repaint the entire thing tomorrow to make it beautiful. :-) On the front side of the hull I made another batch of very smooth peanut butter and using a syringe I forced it in around the PVC. In a couple days I'll take a sander to the whole thing to level it out with the hull.

There were two other holes to drill. These are drains for the rope locker. The holes are drilled at a downward and rearward angle to facilitate drainage and to help keep water from being forced up and into the rope locker.


After drilling these holes I taped them over on the outside and then filled them with epoxy. After about 30 minutes I pulled the tape and cleaned up the epoxy that hadn't been soaked into the wood.
Since I had the 3M 4200 open I finished installing the deck plate in the flotation tank by putting a bead around the bottom and then screwing it in place.

The next thing to be worked on today was the forward deck. I drilled a two inch hole for a hawse pipe (the hole in the hull or the deck through which the anchor rope or chain passes) and two holes for the deck cleat that will hold the anchor in place. I taped off the holes on the bottom side of the deck, filled the two small ones and painted the inside of the large one with epoxy. A layer of 7oz fiberglass was then laid down.

You can just see the two holes for the deck cleat to the up and left of the hawse hole.
Last was the pipe for the hole. I thought a lot about this and I decided to go with a two inch pipe. Even though the rope will only be 7/16" in diameter I wanted to make sure the hole was large enough for it to smoothly feed in and out without being a potential problem if the cap comes off in heavy seas. I also could have gone with something commercial, but I like my idea better (for the moment ;).
A pipe cap was drilled for a screw to attach a porcelain knob to with a small amount of 4200 for good measure.

A piece of two inch pipe was cut and then 1/2" holes were carefully drilled in the pipe and the cap and then cuts were made to the edges. With the rope in the slot and the cap in place there's a minimum of space for water to enter, but the cap can be loosened to allow for air circulation.

The pipe will be cut to length and set in place with 4200 tomorrow. The inside of the rope locker will be properly painted (for the last time) and then the upper deck will be installed and I'll start work on the shelves. These must be finished next before I can start work on the bulkheads and cuddy and cabin.
I'm still waiting on my fiberglass and epoxy shipments. I need these to finish the side-to-chine, hull-to-stringer and transom joints.
8 Hours
Saturday, December 24, 2011
Day 91 - 200 and counting
Individual gloves that is. Yep, I've used 200 of the suckers. Simple rule, anytime I'm working with epoxy or painting with Bilgekote I wear the gloves. If I get a hole in one, I stop whatever I'm doing and replace it. Period.
Productive day today. Had to visit my favorite store to get another sheet of 1 1/8" plywood for the forward deck, a set of blades for the reciprocating saw and a plumb bob.
When I got to the shed the first thing to work on was the floatation tank. A fillet and fiberglass along the deck seams was applied. Then I put in the vertical piece for the rope locker and put in a fillet and fiberglass down the sides and across the bottom. Oh, and up under the shelf edge too.

I needed to give the epoxy time to set up so I marked the center line of the new piece of 1 1/8" plywood and hauled it up on the bow. While I kept it centered at the tip of the bow I bumped it left and right until it was centered on the hull.

I traced the outline of the hull on the outside and the shelves and vertical wall on the inside then drug it off the hull and cut it to shape. It went up and back down a couple times while I refined the cuts, then I put two screws in it to hold it in place and using the six inch sander ground it down to match the line of the hull.
I discovered during this process that the shelves had a pretty serious tilt from inside to outside that required some work with the planer to even out. On the majority of the shelf length this wouldn't matter, but with the top deck being flat the shelves needed to be leveled out to let the deck to sit on them evenly.
While having the planer out I also feathered out the spray rails at the bow. When I first installed them they had simply been cut off flush. Now they gently curve towards the bow.
The epoxy still needed some time to dry so I used the cutoffs from the upper deck to continue the shelves on towards the stern. I only cut out one additional piece for each side. As each one is essentially custom fit I can't get further ahead than one.
Next I used the plumb-bob and a straight edge to transfer the station 6 lines from the stringers up to the shelves.
Finally the epoxy had hardened enough that I could continue work up in the rope locker. I reinstalled the hardware for the access hatch. Then I reached inside the access hatch and traced the shelves and vertical wall on the upper deck, then set the deck on the sawhorses and got out the can of Bilgekote. I painted the bottom side area of the deck, the underside of the shelves, the inside of the hull, the face of the vertical piece and the edges of the shelves. Messy work!


I have five things left to do in the rope locker then the deck can be permanently attached. I need to install an eye bolt to provide for something to attach the anchor rope to; there needs to be a hole drilled and a pipe installed in the deck for the rope to pass through; I need to drill two holes on either side of the bow stem and install the copper pipe and elbows for the bow rope; two holes need to be drilled on either side down in the corner of the locker to allow water to drain; and I need to install (and then remove) three cleats, one for the anchor rope and one on either side of the deck for dock lines.
9 Hours
Tuesday, December 20, 2011
Day 90 - Finally...
The flotation tank is done. Well, basically. :-)
I got part way started tonight and then a friend and her daughter and son stopped by to visit and see the boat. All were appropriately impressed. ;-)
After we talked for a while I got back to work. The bottom side of the deck and its' edges plus the top side of the deck brace got a coat of epoxy and then the deck brace was epoxied and screwed down, and the excess epoxy was turned into peanut butter. A thick strip was laid down the top of the deck brace while a smaller amount was applied to the top edge of the vertical piece and nailers. Then the deck was laid in place and screwed down. More peanut butter was made and put into the gaps between the deck and the sides and bowstem. There was a large area, three inches square, where the sides, deck, chines and hull all coincide. This area was filled in and smoothed to continue the level area of the deck. This will eliminate any places for water to pool. Last I coated the top of the deck with a coating of epoxy. This will probably be the last interior bare wood surface to be coated such. There is still several areas of fiberglass and epoxy to be laid down so I'm not done with it yet!

I'm out of town for the next three days; when I come back I'll fillet and fiberglass the side-to-deck joint, install the deck plate, install the rope locker vertical piece, paint the interior of the rope locker and then I can think about installing the first of the upper deck and shelf pieces.
2.5 Hours
Monday, December 19, 2011
Day 89 - Holyfreeholy...
Well, I'm getting close to final assembly of the flotation tank. Small final details like refitting the deck piece to fit around the newly laid fiberglass at the bow, trimming the rear edge flush with the vertical piece and cutting a hole in the deck for an access plate (store bought this time, it needs to be watertight!) were done.
Then the stinky dangerous part started. I bought a gallon of Interlux Bilgekote gray paint to use for painting the the under deck areas that might be exposed to water like the bilges, flotation tank and forward rope locker.
Now I've never liked painting before, but after using this paint I just might change my mind. It was $70 for the gallon, but it has so much solids in it I was having to constantly stir it to keep them from settling out and when it was applied it did an amazing job of coverage. It was a joy to work with.
The downside?
It's so loaded with VOCs (volatile organic compounds) that the only way to safely work with it is to wear a special mask (which I've been using for my epoxy work anyway) and to use a fan to ventilate the shed. It was a bear to keep things warm with both heaters running full bore but it was absolutely necessary.
I painted the inside of the flotation tank, the bottom of the deck and the inside of the vertical piece of the rope locker.


With that I closed things down and headed home.
Tomorrow I'll epoxy the deck into place, install the access plate and hopefully the rope locker vertical wall.
2.5 Hours
Sunday, December 18, 2011
Day 88 - A little here, a little there
More progress was made today on the flotation tank and the bow area of the boat, but working in this area is really tough. Lots of really steep sides and narrow spaces makes for hard work.
First thing was to take all my work yesterday apart and set the pieces aside.
Next up was to tape the side-to-chines on both sides from the bow back just beyond the the first brace between the stringers that I worked on yesterday. A fillet of peanut butter and two strips of 10oz fiberglass, one four inches wide and the other six. Then it was on to the bowstem.
I cut a strip of 4oz glass ten inches wide, painted the bowstem and sides with epoxy, used my excess peanut butter to fill in the gaps between the bowstem and the sides and laid in the glass.

With the work in the bow finished I could move further back and start work on the flotation tank. The first thing was to finish the brace between the stringers.
I had cut it fairly close, but left it a little tall yesterday, so today after marking on the stringers where vertical piece of the tank would be I pounded it down into place and looking both at the front side and back marked the areas that needed to be taken down to allow for a better fit. Then I took it out and using the six inch sander I took some off. Back in it went, more marking, more sanding until it fit close enough, 1/32" or so. Using the sander I then took the top of the brace down to the level of the stringers. Out came the brace, epoxy on the edges and the hull, a coating of peanut butter and it was pounded back down. Excess peanut butter squeezed out and was pushed into the remaining gaps.
Work followed on the vertical piece of the tank. I cut two more nailers to go on the front side, glued and screwed them into place. The vertical piece got it's lower edges and the underside of the nailers coated in epoxy and then peanut butter was put on the bottom edges. I drove two 4d nails in the stringers right at the marking line just to hold the lower edge of the vertical piece in place. The vertical piece was then carefully put in place and two pieces of tape were applied to hold it upright. The squeeze out was removed and a fillet of peanut butter was put on both sides of the vertical piece. Last a strip of 4oz fiberglass was applied to the stern side of the vertical and blocking to tie them together.


The last thing to be worked on was the vertical piece for the rope locker. It needed an inspection hatch. Now you can buy these pre-made, but since this one doesn't need to be watertight so I decided to make my own. I laid out the lines for a 12" by 12" hatch and cut it out. Then I cut a piece of plywood 1/2" wider all the way around than the hatch dimensions and cut a hole on the inside 1/4" narrower than the hatch dimensions. A little sanding, some glue and screws to hold it in place while the glue dries, two hinges and a latch and Voila'! a hatch! Coated the faces and edges with epoxy.

Cleaned up my stuff which had gotten scattered all over the shed and called it a night.
10 Hours
Saturday, December 17, 2011
Day 87 - Injections
I made a stop last night on my way hone at my local apothecary shop and bought some syringes. I'd been thinking about how to fill the holes and the gaps and remembering how much fun (not!) it was to fill the gap in the transom I knew I had to come up with something better. Syringes seemed to be the answer and I put them to use today. I'd mix up a small batch of epoxy, suck it up into the syringes and then surgically (hah!) apply it where needed. I filled a ton of holes and all the gaps between the sides and the shelves.

That took about two hours, then it was on to the flotation tank. Renn suggests using scrap 1/4" plywood to make patterns and then use those to make the real thing. I've got something easier, faster and better; cardboard! I can cut it with scissors or a knife, it's easy to mark on with a pencil and I spend less time walking back and forth the length of the boat. :-)
I started first with the vertical piece of the tank. After several back and forths trying to get the angles right I got the right side done. As usual the left side went mighty quick.

Now that vertical piece has a section of 2x3 that stretches from the inside face forward to the bowstem, but you have to provide more support than just glue or epoxy to hold it in place. The solution is a "saddle" that is glued to the inside face to help support the 2x3.

Once that was glued in place and the 2x3 cut to length and screwed down it was on to the top piece. This is where the cardboard really shines. I ended up cutting four different pieces to be able to trace all the crazy shapes and as I finished them I just literally screwed them together.

I cut the top piece and then moved on to the vertical piece that will create space for the chain locker (or in my case rope locker). There will be a hole in the forward deck that leads down into this space and you feed your anchor line in and out for storage. Just as before, I made patterns, screwed them together, transferred the shape to the plywood and cut it out.

Tomorrow I'll work on epoxying all this together. There's a significant amount of epoxy, peanut butter, fairing and assembly work to do and I have no doubt that things are going to get adjusted on the fly. :-)
10 Hours
Thursday, December 15, 2011
Day 86 - Gettin' with it
Is what I gotta do.
Once again I showed up tonight, discombobulated and unprepared to get anything done. There's just too many things to do and I need to make a plan and work it.
So tonight I started work on the bow flotation tank. It should really be called a crash tank. This is an area of the lower forward hull that will be boxed and sealed off. It's main purpose is so that if you hit something in the water at speed and crack or crush the hull at the bow this will hopefully stop or slow down water intrusion. Hopefully. ;-)
Anyways I spent a lot of time measuring and studying things. My stringers are level side to side, but slightly lower at the stern than the bow, so I'm going to measure everything from them. I've permanently marked station 6, a line across the hull approximately 10 feet from the tip of the bow, right where the shelves start to curve inward. This will become the forward and aft primary measuring point.
Next I cleaned up the bow stem area with the sander. There was lots of epoxy drool from the work in that area.
Then I started work on the blocking. It's pretty tricky as the hull obviously curves so I had to cut 1 1/8" ply to width to fit between the stringers. Push it down until the corners contact the hull. Then using a homemade scribe (a giant version of the compass you used in school) I traced the hull onto the ply and cut it to shape with the skilsaw, put it back in, marked it for adjustments and tried it again. I'm only trying to get it close, I'll fill the gaps with peanut butter. I got the one at the flotation tank and the one at station 6 done before it was time to call it a night.
Tomorrow I'll cut the one for the rear bulkhead, then figure out how to scribe and cut the pieces for the flotation tank. Much pondering will be required me thinks. :-)
3 Hours
Wednesday, December 14, 2011
Day 85 - How...
do you eat an elephant?
I've spent a lot of time the past few weeks doing design work on the interior of the boat. I'm veering further away from Renns' plans as I have my own specific ideas about what I want inside.
The start of that was today with a trip to Home Depot to get more plywood. The interior will be done with AC plywood instead of marine plywood. It's about 1/3 the cost. One sheet of 1 1/8" to cut up to use for blocking between the stringers and the sides. Blocking provides cross-hull reinforcement to help keep the hull from flexing and folding like a book, a place to attach things and a way to delineate sections of the boat (cuddy, cabin, rear deck). Three sheets of 3/4" for the decking. And seven sheets of 1/2" for the superstructure. Hauled them into the shed and stacked them on the floor, hopefully in the order I'll use them. :-)

Then I stepped back and thought "What next?" There's just so much to do it's a little overwhelming. I suppose if I'd done it before it'd be easier, but I haven't so...
I decided to work on cleaning up the shelves. There was lots of drips of epoxy, sharp edges of fiberglass, rough cut edges of plywood and scarfs to cleanup. I grabbed the jigsaw and sander and went to work.
When I got to the bow there was a lot of work to do. There was a difference of almost 1/8" in height between the two shevles where they came together. A minute or two with the six inch sander and that problem was solved!

A good vacumming and everything was shipshape. I've ordered more fiberglass as I'm almost out of 10oz and I forgot to order 24oz woven. The 10oz will be used to tape the inside of the sides-to-chines, sides-to-transom and transom-to-hull. The 24oz will be used to glass the stringer-to-hull joints. Woven fiberglass is much stronger than cloth so that joint will be very strong!
I also need to order more epoxy as I'm almost out and I have a long way to go.
A good nights work.
3 Hours
Tuesday, December 13, 2011
Day 84 - Fingertip control
First day back to work after flipping the boat two days ago. First order of business was to get stuff reorganized and put away. Next up was removing all the internal braces from the inside of the hull, setting them outside. I collected all the 2x6 scraps and cut four pieces to make a third furniture dollie, two just wasn't enough last time. Then I cut the 2x4 braces getting rid of the supports at the ends that had been used to hold the shelves in place.
To get into the boat to remove the braces I clambered over the transom through the outboard cutout and that just wasn't going to work. I contemplated buying a small step ladder but decided that wasn't going to work so I built a set of steps.

Once the steps were built it was time to move the boat back to its original position on the floor. I had traced around the corner legs before we flipped and now I needed to get it back into place to get the jig back to level. I rolled a dolly under each end and one in the middle and starting at the front, then the middle and then the back jacked it up about an inch and blocked it up.

I screwed some wood scraps to the floor to denote the two corners I needed to move to and then grabbed the transom end of the boat and pulled! And Holy Cow! I almost yanked it across the shed! I went up to the bow and pulled and it moved just as easily. I worked back and forth and got it almost exactly lined up! Less than a 1/4" isn't bad at all.


I lowered it back down, put a level on it across the transom and along the stringers and what do you know, but it's right back to where it was upside down. Yay!


With the boat being so easy to move while on the dollies that sets the stage for moving the boat from the shed to the trailer. The way the boat and the shed sit right now there's no way to get the trailer in to where the boat is and the plan all along has been to disassemble the shed down to the floor, rotate the boat and then move it onto the trailer. The process today confirms that the plan is viable. Woot!
4 Hours
Saturday, December 10, 2011
Day 83 - Flippin' Amazing!!!
Well, it's done. The boat is FLIPPED!
The day started early; I was at Home Depot at 7:30 this morning to buy 2x4s, 2x6s and casters. Over to Western Auto to buy a bottle jack and then off to the shed.
Wow was it warm inside this morning! Leaving two heaters running overnight brought the temperature up to 85! The epoxy had hardened up enough that I wasn't going to have to worry about it when we went to flip the boat. Yay!
First I took the tent down. Opened the space back up visually, which was great, made things just... feel better.
Grabbed the small sander and went to work getting rid of the excess epoxy on the spray rails, sanding the sharp edges off and generally smoothing things down.
I measured under the hull for three 2x4 cross braces, then cut them to length. Next I cut the 2x6s into two foot pieces and screwed them together with the casters to make furniture dollies. Crawled back in underneath and screwed the braces to the shelves, then very carefully jacked up one end of the jig and put a furniture dolly underneath and did the other end. It was a little creepy listening to the jig creak and pop. Crawled out and pushed the boat closer to the wall and then removed the furniture dollies.
Then it was time to haul stuff out of the shed and into the garage. And haul stuff. And haul stuff. Man I had a lot of stuff in there!
Left the broom and the shop vac behind so I could clean up as much of the sawdust as possible. It had crept in everywhere. I was knocking it off tools and wood as I hauled it out, coating the fiberglass where I had to knock it off by lightly brushing the glass, piles under the hull (how does that much get underneath?) and piled up in every crack and corner. Yeesh. Last, I mixed some hot water and ammonia to wipe down the hull. The graphite bottom is slippery enough without a coating of dust to help. :-)
I put the ladder up and set up my GoPro camera to capture the flipping process.
By this time it was 12:30 so I ordered pizza and waited for folks to show up.
And show up they did! The first to show up was Mike and Ben Schlecter. Mike has built a Tolman Widebody, which I have yet to make time to go see. Shame on me. Then others started to show.
Let's see, Patrick DeFreest and his friend Kirk, Gary and Daniel Leder, Wes Cassell, Steve Mattix, Mark and Darryl Petz, Brian Goettler, Chad Dubois. Plus me, that makes 12! Whoo hoo!
We talked boat stuff for a few minutes, then I got everyone's attention and explained the flipping process, what to watch out for safety wise and did a final glove check (no blood on the boat now!) and we were off.
I'm just going to post the video here, as that's easier to watch than me to explain!
As I'd told people it took about fifteen minutes and we were done!

Yay! A GREAT BIG HUGE THANKS! TO EVERYONE!!!
After everyone left I hauled all the tools back in, sorted the lumber scraps into keepers (into the shed) and burners (into the truck) and finally the epoxy workstation.
Made a run down to the beach for another small bonfire and watched the sun go down. It was an amazing day, no wind, no rain, the boat it safely flipped and I'm PSYCHED to get started on the inside the hull work.
I need to move the boat and jig back to it's original place on the floor, get the boat releveled and then I'm off.
Spent about half an hour just staring at the boat thinking and wondering and being amazed and then I went home.
8.5 Hours
Day 82 - Prep, prep, prep
Whew! What a night. Ok, here's the list.
First I pulled the tape I had put on the bottom of the spray rails to cover the holes between the strips of plywood I filled with epoxy last night and pulled all the screws.
Next I built a jig to screw to the bottom of the Skilsaw to trim the spray rails to the same width. I had aligned the sloped edge and let the 90 degree side be off. In some places the difference between the three layers of plywood was as much as 1/8". After attaching the jig to the saw I very carefully trimmed the spray rails. Now I hadn't thought about this ahead of time, but cutting with the blade on the top of the saw kicking all the sawdust almost straight up meant I was working in a constant rain of sawdust! When I got done I was covered!
Grabbed the handsaw and cut the spray rails off flush at the bow. I'll add some curve to them after the boat is flipped. I also used the router to round over the 90 degree corner on the spray rails.
I let the sawdust settle and then swept the hull, sides and spray rails to get rid of the worst of the sawdust. I made up a batch of epoxy and lightly coated the top of the spray rails I had just cut, then made a little more and turned it into peanut butter which I used to do final fairing on the top edge and then to fill in the screw holes.

I really didn't want to do any epoxy work as it needs time to set up, but this is the last opportunity to do this while it's easy to do (instead of upside down). I'm leaving two heaters running tonight to keep the temperature up. It was 75 degrees inside when I left. Hopefully that'll help the epoxy set up before tomorrow afternoon.
Then it was on to prepping underneath the hull for tomorrow. I clambered forward to the bow and removed all the screws holding the 4x4 bow stem support in place and pulled it out. The hull shifted just a little so I took the 4x4 and put it under the edges of the hull to help support it when I took the horse out.
The horse was next. Pulled the screws on the side supports, then removed the triangle braces and kicked the legs out and the hull didn't move at all! Yes!
Took the 2x6 and slid it under the jig and measured to length and cut it and a spare 2x4 for legs and added them to the jig. It lines up underneath the keel so it will become a major support point.

Looks kind of empty doesn't it?
Put stuff away, cleaned up and called it a night.
Tomorrow is the BIG DAY. I'll be up bright and early to install three cross braces inside, jack the jig up and move it closer to the wall, move everything out of the shed to the garage, sweep and vacuum the floor, vacuum and wash the hull to get rid of the sawdust, take down the tent, order pizza and pop, then wait to see who shows up. :-/
5 Hours
Subscribe to:
Posts (Atom)